There are a number of options for heating the water, from the small gas burners to breaking out the BBQ, or, in my case start a little fire to boil the billy. The “fire” option is really in all of us isn’t it? Hands up if you don’t enjoy starting a fire from scratch. Just as I thought – no one. Sometimes it can be hard to get the rock rim level for balancing a pan or pot so the alternative is a firebox. There are a number of videos on the web with these and they are ideal for a small cookout using a frypan or something similar. Even a small one runs near $100.00 then add a cover. For the 10 best camping gear and gadgets to buy in 2019 check out this article here
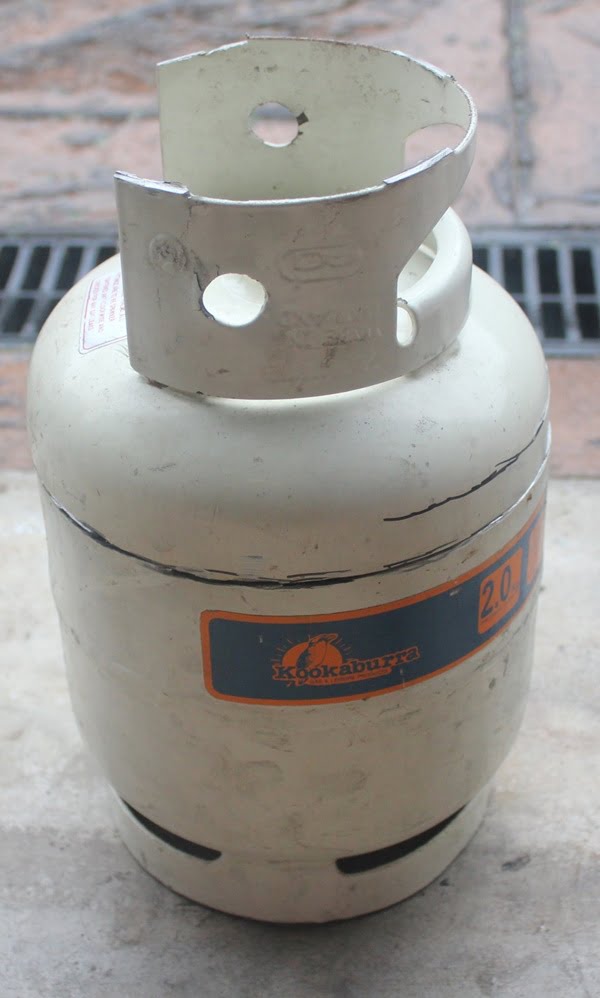
This little article shows how I built a small firebox for free from an old 2kg gas bottle that I can carry in the Ute and is small and fairly light. I certainly will not be backpacking around with this but it only weighs about 1 Kg. I can even fill it with some wood before leaving so I know I am right to go when I get there. Remember: Safety first so make sure to follow the instructions about purging the bottle.
Step 1: Obtain the gas bottle. That was easy. I am member of a local community Facebook page so I put a call out for anyone who wanted to dispose of a 2kg gas bottle and it didn’t matter if it was out of date as it for a small project. Within 15 minutes I had two replies and the next day picked it up. It was it very good condition but they are not worth getting checked and people have trouble getting rid of them.
Step 2: Purging the bottle (remember the safety warning- this is that really important bit). This involves filling the bottle totally with water and inverting it to let the water drain and fill with air. Easy in theory at least.
The bottle was well out of date and had a bit of gas in it. Even a bottle that you think is empty should be purged to make 100% sure. I opened the valve and within about 30 seconds it was empty. That night I inverted the bottle and left it with the valve open. The LPG is heavier than air so in theory it will sink to the bottom and drain out.
I thought it would be easy to remove the top valve from the bottle….WRONG. It must have put in by Godzilla on steroids. Next step then was to close all the valves and carefully grind off the top protective shield so I had better access to the valve. I still couldn’t crack the seal and budge it. I even tried a sledge hammer.
I opened the valves again and slowly filled the bottle with water. Due to the valve going into the bottle there is always going to be a little bit of gas left and I had to get that out. You could smell the gas still coming from the bottle and I did not want an explosion of any sort.
My son’s idea, which I followed, was to lay the bottle on its side and drill a 6mm hole into the water so that it couldn’t spark. Then rotate the bottle until that hole was at the top and fill it via the valve. When the water came out the hole I drilled it had to be full. Finally, it worked and there was no more gas smell.
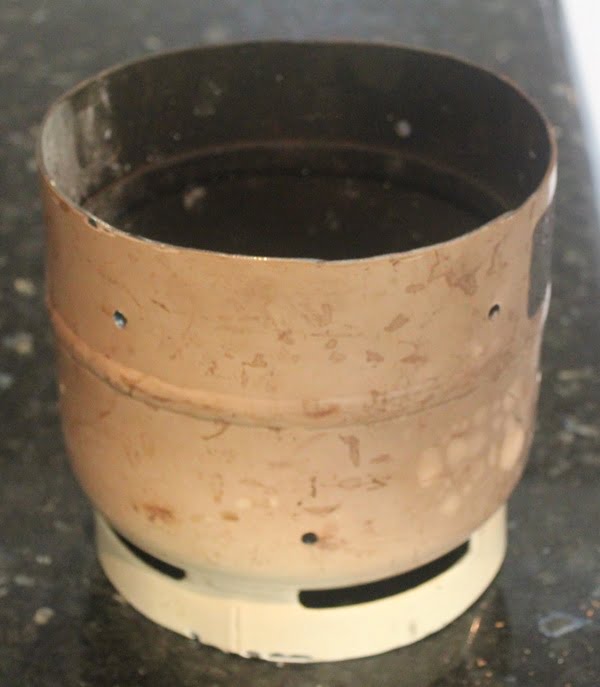
Step 3: I marked a line around the bottle so that it would be 18cm (7 inches) high measured from the ground and used an angle grinder to remove the top. I smoothed the edges and made sure they had no sharp bits. This was the time to check that the cut was level and it was.
Step 4: Back to the 6mm drill and I put 4 holes in the base under the stand and 7 further holes into the body of the bottle. That was 4 about 8cm up and other 4 about 15cm up. I wanted a good air flow but not too much as the fire needed to make coals for cooking. In actual fact that was plenty and if I do it again, I will only start with the base holes and about 4 in the lower half of the bottle.
Step 5: Testing. It worked really well, though I think that a few less air holes would be better. It burnt a fierce fire and left about 2inches of hot coals on the base for cooking.
I did realise that I should have used a bit of paint remover prior to lighting, but that old paint burnt off as well and, being all steel, the heat that it gave off was actually amazing.
When I made the initial fire, I firstly put some small sticks in as a base to keep it away from the holes at the bottom. Then the tinder bundle was lit and placed in it and sticks for fuel added.
Hope this generates some interest and if you do give it a try, let us know how it goes.

